Wednesday 6 November 2019

1/6 Sale Post - Vehicles

Hi
This is the vehicle sale post.

Shipping will have to be calculated by address so if you see anything here, you will have to contact me and let me know your address, just city and zip/postal code should be enough.

Please note that shipping for any of the tanks would probably be cost prohibitive so pickup might be needed.  I am also willing to drive up to 4hrs (one way) to deliver but arrangements would need to be made prior.

1.  Original GI Joe Adventure Team vehicle, great condition, Controls still in-tacked. Nice clean vehicle.                                                      $35.00 + shipping


2.  21st Century Mutt Jeep, missing a few parts, windshield bracket is broken but still works going up and down.  as shown  $40.00 Pending


3.  SOLD

4.  WWII Dragon Jeep Model Kit, brand new in box.  $125.00, Shipping by location.


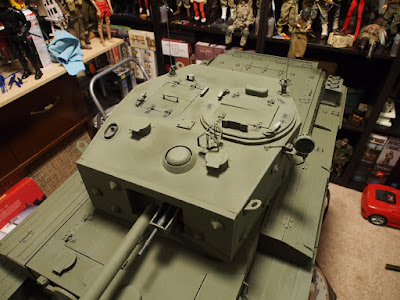
5.  One of a kind 1/6 Scale Sherman Firefly M4.  Complete custom build from a 1970's fiberglass hull. Over $2000 worth of ECA parts and 100's of hours or work went into the build of this tank.  It was built by Geoff Truscott and Harold Jones. Pickup or delivery (within reason only). $2000 or Best offer.


5.  Bren Carriers.  These are custom built to order.  Full detail version is $650.  Base model is $375.
Shipping based on country.

Detailed:  MkII with custom vickers MG mount


Sunday 17 March 2019

Scratch Build - WWI German EV4 Armoured Car

So another commission build project. This is a WWI German EV4 Armored Car. Now I don't normally do German stuff, like I said when I built the Adler.  But this one was pretty cool looking and when I first looked at it, just a big box.  Now that I have a 1/35 model of it, it does have some funky angles to it.  Should be a fun build.  Like most of my builds I start by making plans.  I usually find either blue prints or some sort of drawing to mark on and scale up from a smaller model.  I find this is the easiest and more accurate then trying to make something from just a two dimensional drawing.

Anyway, as I move along I will post more photos, for now here is what I will be making...


Monday 4 March 2019

Staghound update #1

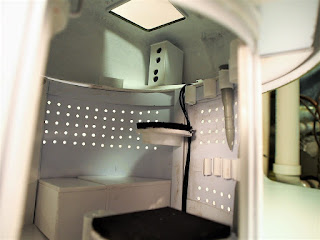
More work has been completed and the Stag is starting to look like it should.  The other thing I did was create a turret basket with seats, controls radio etc.  It nice to open the hatches and look inside and see something that looks like a full interior.  I always try and add a bit of interior to my builds as it gives that element of realism to the models.  Now unlike 1/35 scale models which some have full interiors available, no one makes anything in this scale so its up to me to build it.  I try and get as close to real as I can, but sometimes its just a "look" then 100% accurate.

Anyway, here are a few pictures of the turret, turret basket etc..


Front Drivers section showing detail 


Rear of vehicle showing exhaust


1/6 Staghound

So, I started this build about 2 yrs ago.  It started out with a "can I do this" type question.  The reason I asked this was the turret.  It has a very unique shape and to do this right, the turret has to be right. 

So after figuring out how to do it, that was the start of the build....I'm not going to go into how I did it, cause honestly, I do make some of the vehicles as commission builds and as sure I don't want to give away some of my trade secrets as it were ... so anyway here is a few pictures to show the process.

Like all my builds, it starts with good drawings and plans.  I also try and use a 1/35 scale model to scale up from....


Here is the first mock up of the hull and turret, I use Styrene Plastic, I buy it in 4' x 8' sheets and cut it down to size...


Another obstacle was the wheel and tire.  The Staghound has a unique Rim and tire.  After much searching and scratch building, I ended up going the 3D printing route to try and get the most accurate tire/rim I could.  I use this as my master and cast them as hollow as I can and spray them with a rubber coating to act as rubber.


Cromwell finished

Well, its been awhile but the Cromwell is finished.  It was a long journey but worth it.  The longest and hardest part...the tracks.  The tracks took me a little over a year to make.  I needed 250 of them and ended up casting about 300 or so.  With casting failures, time etc it was a long process.

But in the end I have a Cromwell tank, scratch built, with correct track links.  Now I have sold this model to another collector...which is both good and bad.  Good as it shows my work in worth the effort when others like what I make and want to acquire it.  bad cause it was a long and hard build of something I really like.  I love this tank and its the jewel in my collection...but onward and upwards as they say...
Here are a few pictures of the finished model