With a little planning, time, money and a little luck, you can build a wonderful model that will be accurate, detailed and something to be proud of. Something like this...my 1st build.
The Dragon model is an exact copy scaled up from their 1/35 scale model. With that there are a number of errors, flaws and problems associated when they did this. Don't get me wrong, its a great model, with some work can be very accurate, detailed and museum quality....but it can also look like a toy if built right out of the box. It takes time and money to do it right, but can look spectacular when done. I have seen many many builds on the forums and internet, some are unbelievable works of art, others ...well not so much. I once had a guy say he can build them in 4 days or less. After reviewing the kit, I would say yes you probably can, be the final product would leave a lot to be desired. I can say from experience, sanding part lines alone can and has taken me days/ into weeks to accomplish. One thing about my vehicle builds, I try and build as if it was going to be judged at an IMPS show. Leave no part untouched and you to can have a fantastic looking tank.
With that in mind, I thought i would start this blog to help others who may either have this kit and are starting to work on it, or may want to buy this kit in the future. My plan is to show case tips and suggestions when building this kit. The Dragon kit is a good starting point, but far from a "complete" model. There are a number of errors as well as very soft detail for a 1/6th scale vehicle.
As a go though my build i will point out the errors and what should be replaced or reworked to improve the model. I will also show you many area's modelers either miss of ignore when building these kits. IMO if your going to do build something this big and expensive, might as well do it right from the start. It is not a toy (like the 21 century Stuart), this can be a museum quality piece. I strongly suggest anyone starting to build this kit, either watch this thread, or go to youtube and search out the videos posted by East Coast Armory on John's build of these vehicles.
So to get started you need to know what you are working on. This model is a Mid to late war, large hatch, high bussell, Sherman M4A3 either in the 105 Howitzer or 75MM gun configuration. Mine is going to be the 75mm gun as the gun matlet is wrong for the 105. The reason its important to know what vehicle designation it is, is so that you can get the markings, casting numbers, hatches etc correct as there are a number of different configurations on the Sherman during these production years.
So lets begin. I won't bore you with all the stuff out taking everything out of the box and looking it over. The largest section of parts is for the suspension and wheels. But best to be safe then sorry and make sure everything is there. Then you want to separate it into the following sections:
Transmission Housing
Lower Hull
Suspension
Upper Hull
Turret
as this is how we are going to be building our model, starting with the transmission housing. But first we want to go though what we are keeping and what needs to go.
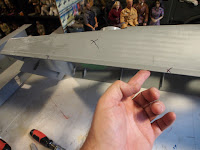
One of the 1st things I do is grab a marker and mark the area's that I am going to remove. 1st the area's that are errors on Dragons part. The molded in detail under the front sponson area, the grouser covers, and the vent on the turret are all wrong, either wrong shape and size or should not be there. I also remove the side skirts (side of hull with holes) as these are to thick, wrong size and do not hang down enough. The hull vent is also going to be replace as the stock one is the wrong shape and soft detail. I will also be replacing all the bolt detail with real brass bolts.


2nd step is to fill in the area's of the model where there is either holes or shoddy plastic. Area's I first filled in where the front tow eyes, the front sprockets and the sprocket covers. I use casting resin but any sort of putty can work. Once that is done I start with the Transmission Cover & Sprockets as its one of the most visual aspects of the Tank. I hate the way the stock sprocket spins/sits on the cover, so I filled in the sprocket and cover with resin, then drilled a 1/4" hole and inserted in a 1/4" rod, secured with epoxy. Once the covers are attached the sprocket will spin freely and stay in place more securely then stock. The stock sprocket was reworked with new bolt detail, hole drilled in the center etc. The trans covers had casting material added as well as the secondary round cover (missing from the model) which should be there.


Up next is putting the Trans housing together....


Good start Andrew!
ReplyDeleteLooking forward to the next update!